
 Fleet Management
Shipday
Automate your local deliveries by connecting Shipday with Bird Pickup & Delivery. Once set up, delivery orders are sent to Shipday automatically—and status updates sync back in real-time.
Important: Uninstall the Shipday Shopify app before enabling this integration to avoid duplicate orders.
Prerequisites
- Shipday account with API access
- Shipday API Key (found in Shipday Account → Integrations → API Credentials)
Setup Guide
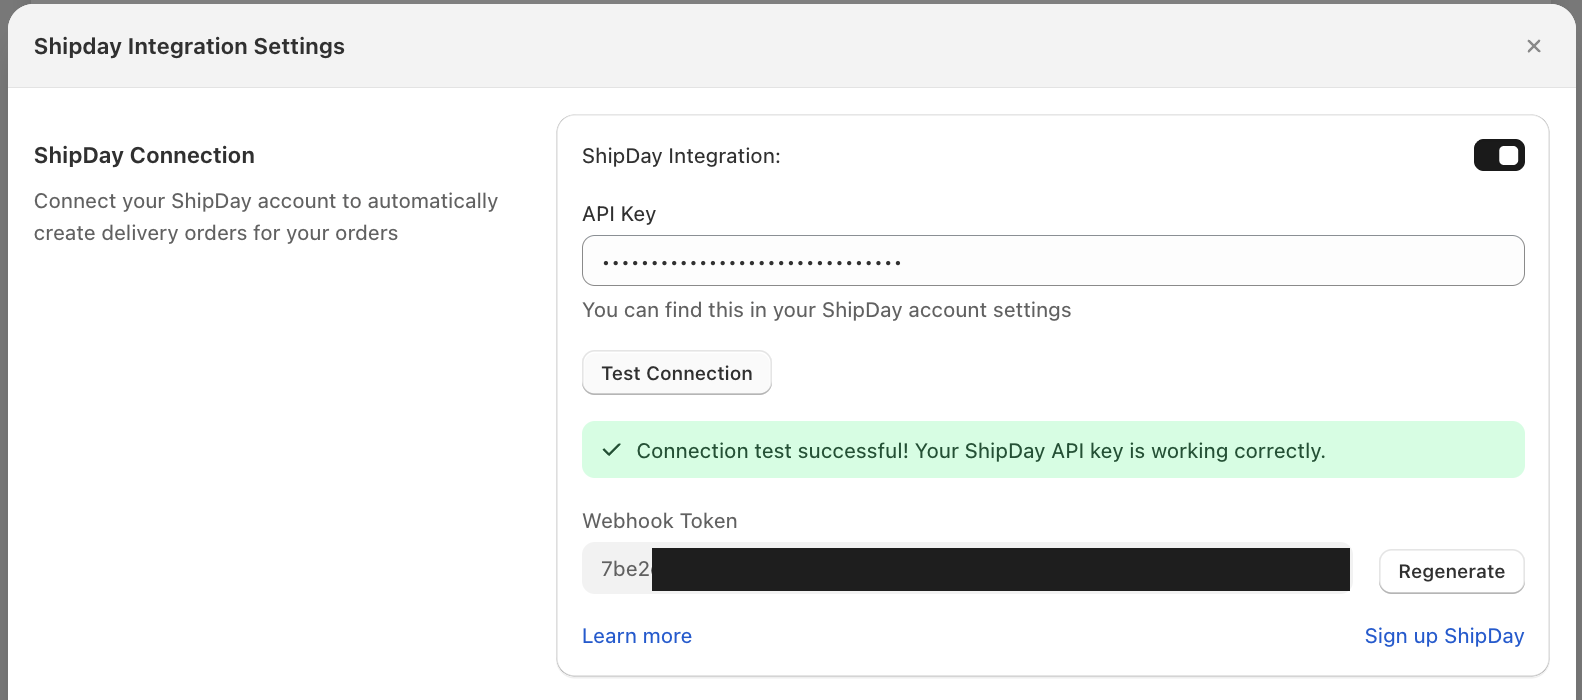
Step 1: Connect Your API Key
- Open Bird Pickup & Delivery → Settings → Integrations → Shipday
- Turn the integration ON
- Paste your API Key and click Test Connection
Step 2: Add Notification Email
Enter an email to receive alerts if an order fails to sync with Shipday. This helps you resolve issues quickly.

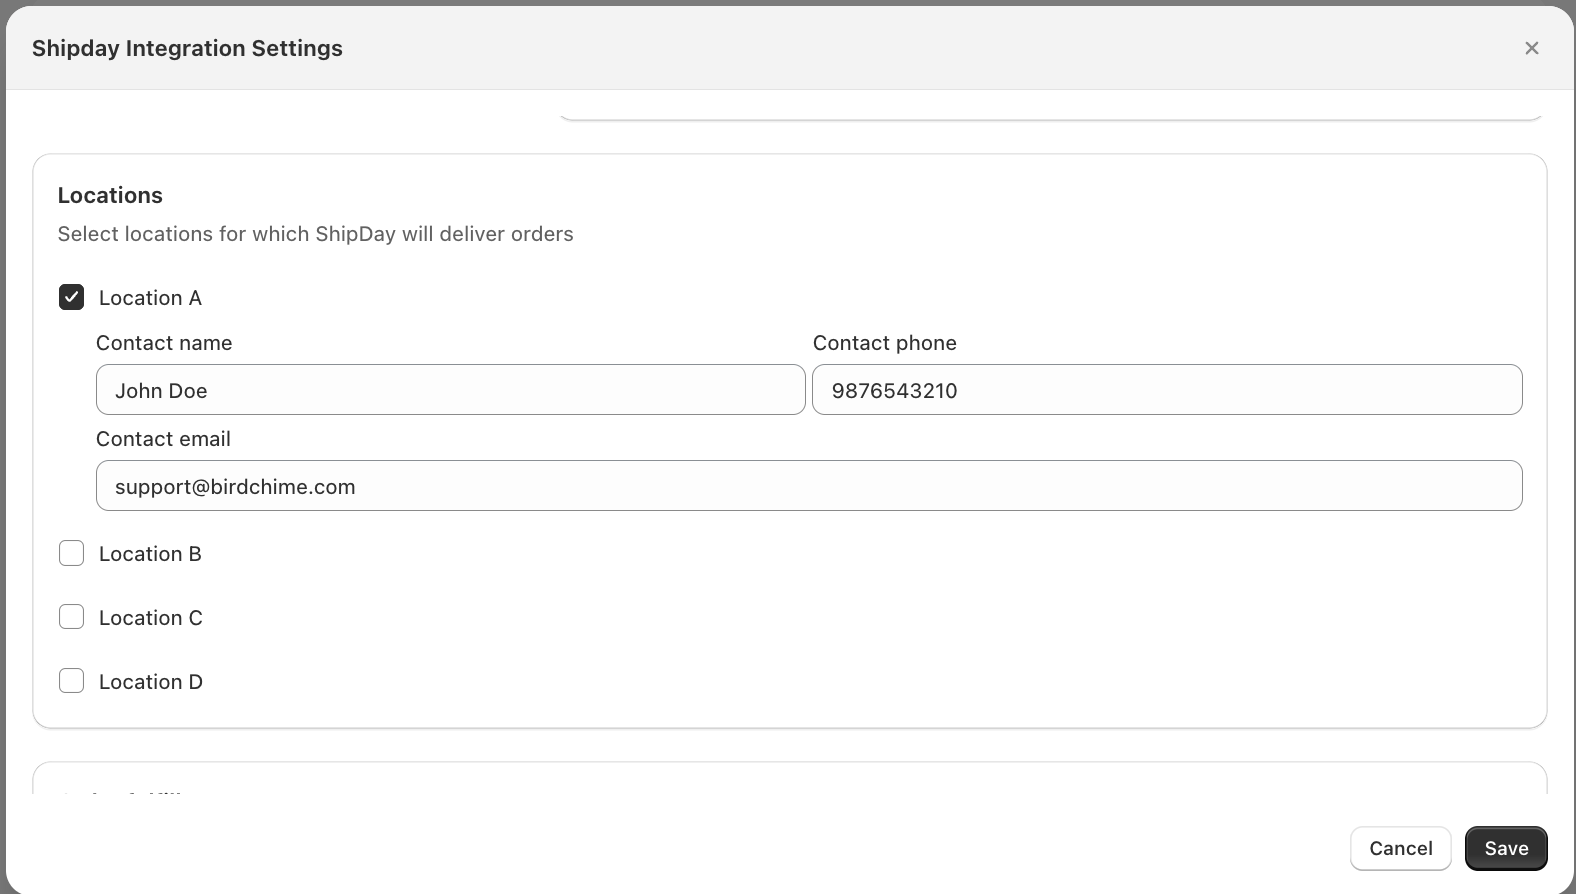
Step 3: Enable Locations
Select which locations should send delivery orders to Shipday. For each enabled location, add:
- Contact Name — for driver interaction
- Contact Phone — for delivery coordination
- Contact Email — pre-filled from your account email; change it if a different person handles pickup at that location
Only orders placed for enabled locations are sent to Shipday.
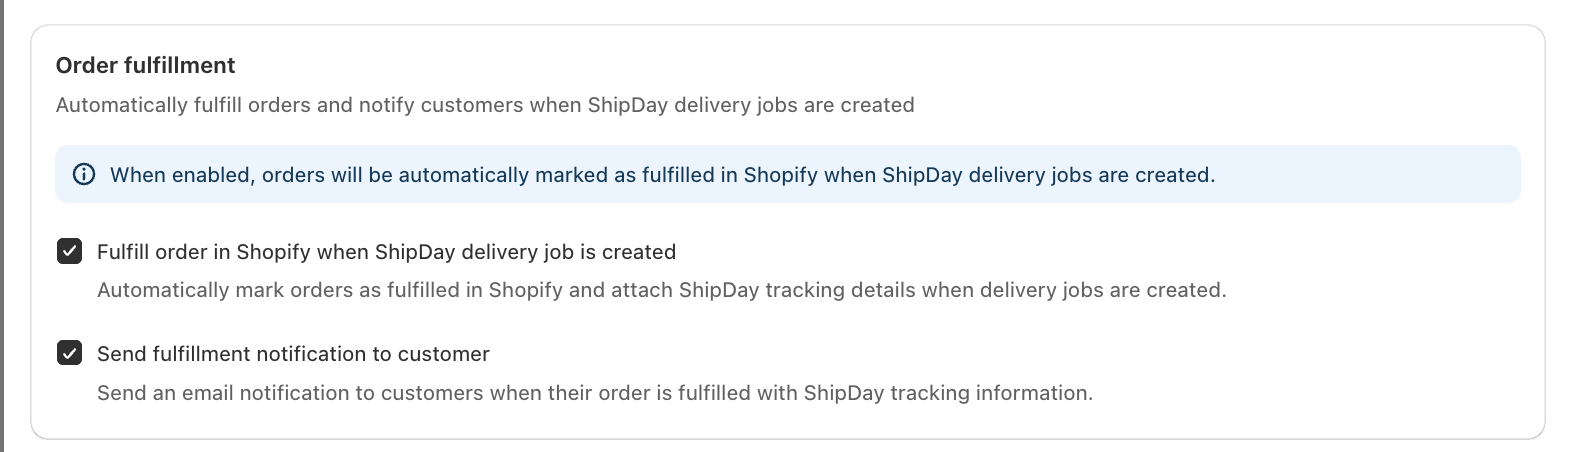
Step 4: Order Fulfillment (Optional)
- Tick Fulfill order in Shopify when ShipDay delivery job is created to mark orders fulfilled and attach Shipday tracking.
- Tick Send fulfillment notification to customer to email that tracking to the customer.
- Leave both off to fulfill orders yourself.
Step 5: Save
Click Save to activate. Bird will now send eligible delivery orders to Shipday automatically.
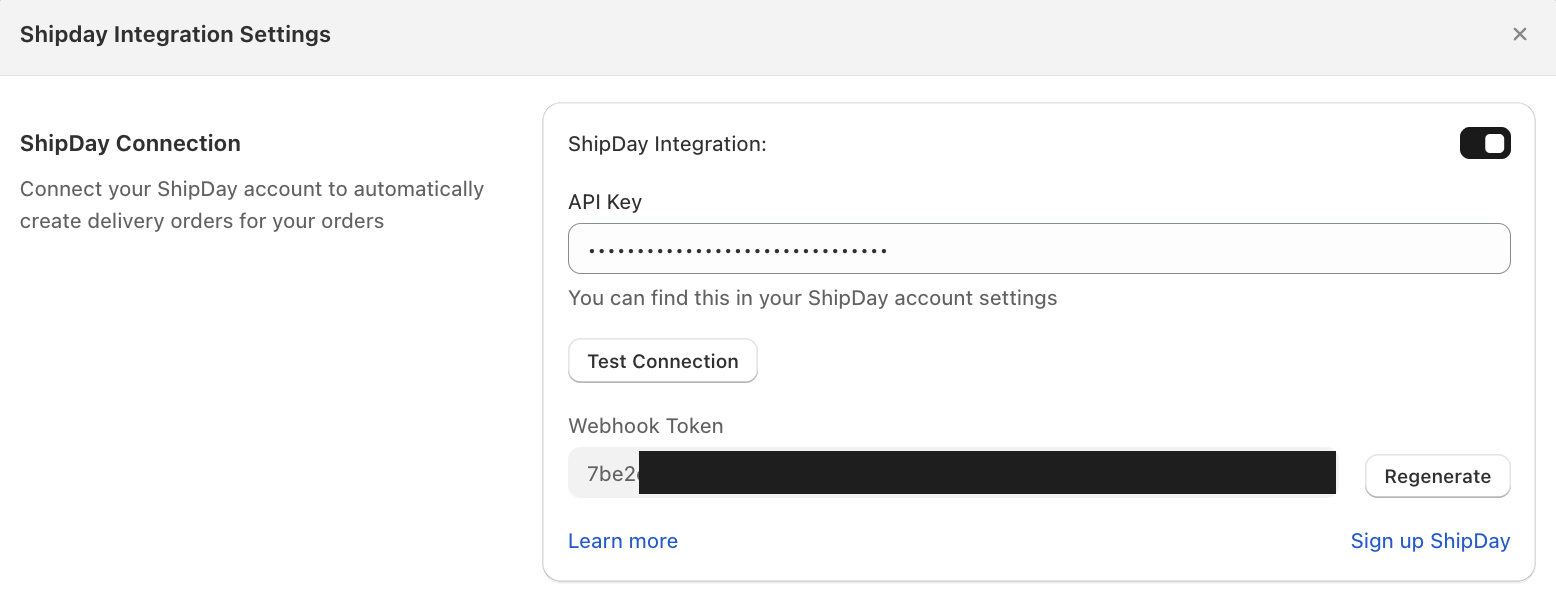
Step 6: Configure Webhooks in Shipday
Required for order status updates to sync back to Bird.
- In Shipday, go to Integrations → API Credentials → Webhook Setup
- Webhook URL:
https://picdel.birdchime.com/webhooks/shipday - Token: Copy from Bird → Settings → Integrations → Shipday
Disconnect Shipday
- Open Bird Pickup & Delivery → Settings → Integrations → Shipday
- Turn the ShipDay Integration toggle off and click Save.

Bird stops sending orders to Shipday right away. Orders already in Shipday are unaffected.
How It Works
When a customer places a delivery order, Bird sends the order details and scheduled delivery time to Shipday. As the delivery progresses, status updates sync back automatically:
| Shipday Status | Bird Status |
|---|---|
| Started | Dispatched |
| Delivered | Fulfilled |
Which Orders Sync to Shipday?
Orders are sent to Shipday when:
- Order type is Delivery (not pickup or shipping)
- The location is enabled in Shipday integration inside Bird App.
- Order includes Bird scheduling details
Draft orders are not sent. They sync only after conversion to an actual order with Bird scheduling details.
Troubleshooting
| Issue | Solution |
|---|---|
| Orders not in Shipday | Verify location is enabled, order is Delivery type, not a draft |
| Connection failed | Use API key directly from Shipday, not masked email passwords |
| Wrong delivery times | Check timezone in Shipday → Locations → Timezone |
| Status not syncing | Confirm webhook URL and token are correct |
Support
If your orders aren’t going to Shipday, please feel free to contact
- For Integration issues: [email protected]
- For Shipday account help: [email protected]
Related Articles
Was this article helpful?
Thanks for your feedback!