
 Shopify Configuration
How to Customize Checkout Labels for Pickup and Delivery
Problem
If you want to personalize the checkout page and make it clearer for customers, you can customize Shopify’s default checkout text. This is especially useful when the standard Local Pickup view doesn’t match your setup and you want customers to clearly understand the fulfillment method they’ve selected.
How this article helps
How to open Bird’s checkout label editor, what each field changes for Pickup and Delivery, and when to reach out for anything beyond that — so customers understand their fulfillment method clearly, with fewer support questions and less checkout drop-off.
Bird generally disables Shopify’s built-in pickup option, except for Shopify Plus stores and stores that offer pickup only. See Why Do I Need to Disable Built-in Shopify Pickup? for why we recommend disabling it, or keep reading here if you only want to change the wording.
When Shopify’s built-in pickup is disabled, checkout may still display Shopify’s default fulfillment wording. These labels may not clearly indicate which fulfillment method the customer selected. Customizing the labels helps make the checkout experience clearer and ensures customers understand whether they selected delivery or pickup.
Customize your checkout labels
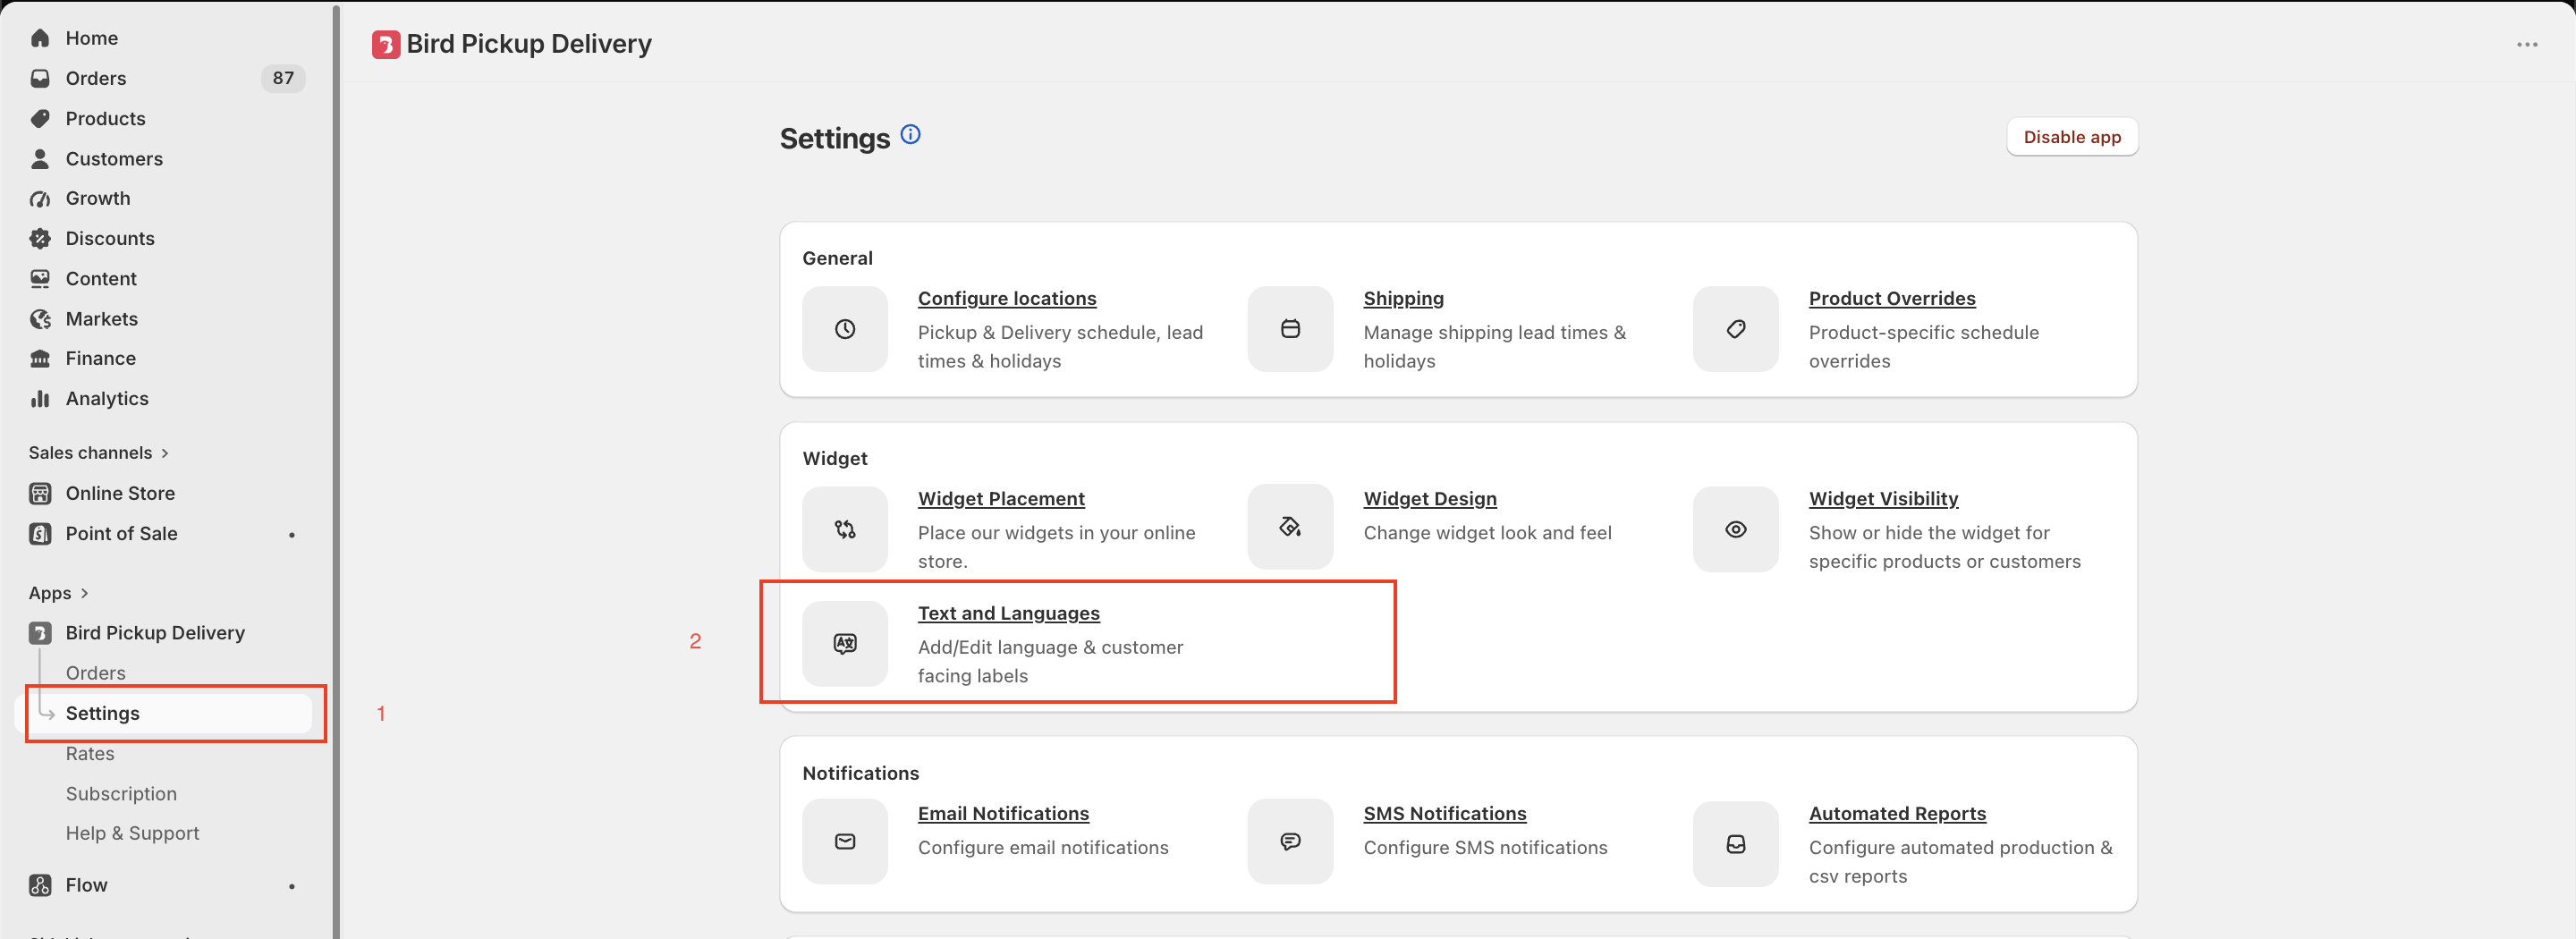
- Go to Bird Settings > Text and Languages. The page opens on your default language; if you support more than one, pick it from the dropdown next to the page title.
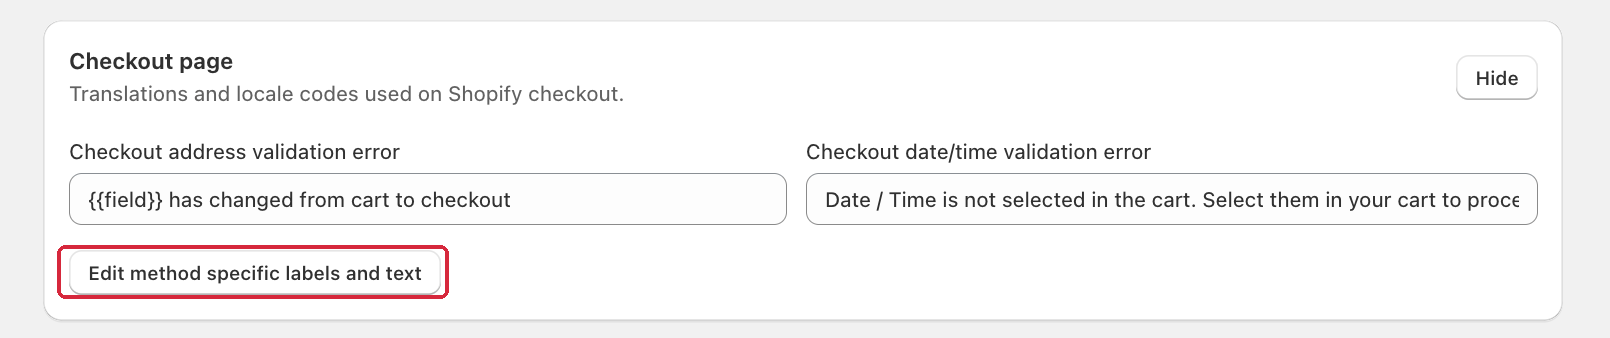
- Scroll down to the Checkout page section and click Edit method specific labels and text.
- Switch between the Pickup and Delivery tabs. Each has the same fields:
| Field | What it changes |
|---|---|
| Address section title | The heading above the address form |
| Method title | The heading above the selectable pickup/delivery option |
| Method description | Optional description text for the method |
| Saved addresses heading | Heading above a customer’s saved addresses, if they have any |
| Order summary method title | The line-item name in the order summary |
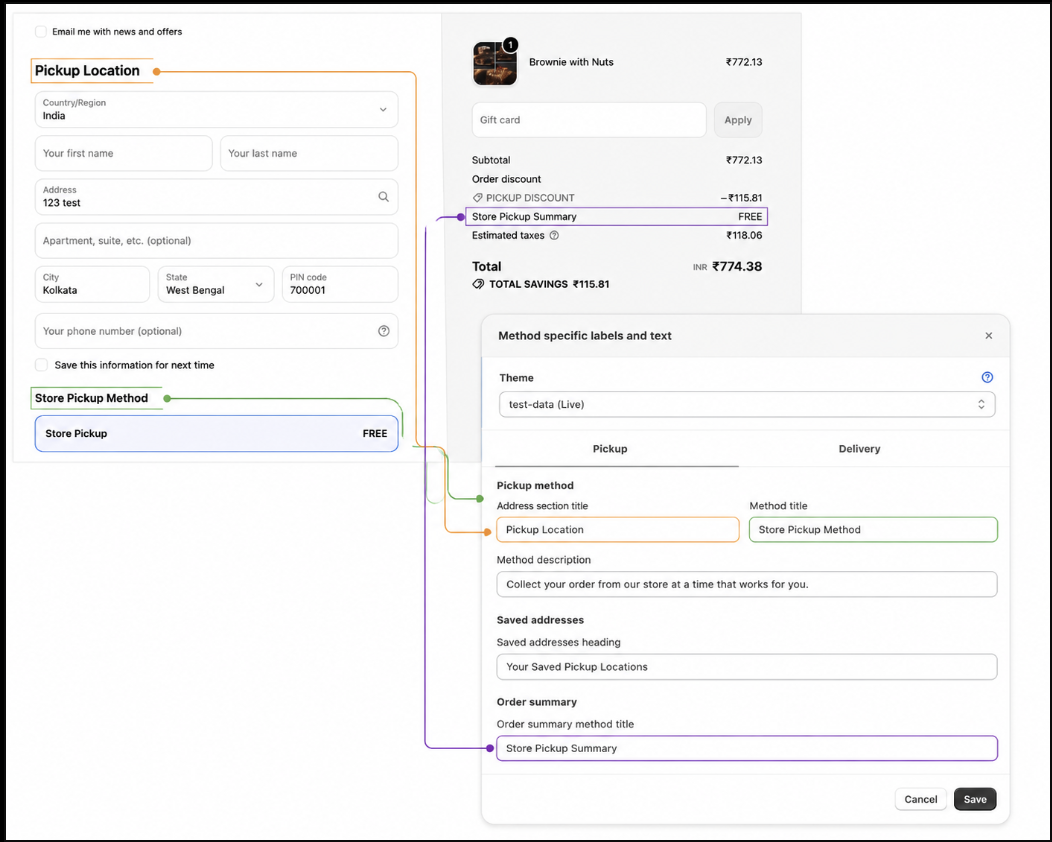
Address section title, Method title, and Order summary method title traced to exactly where they show up at checkout.
- Fill in whichever labels you want to change and click Save. The new wording shows up at checkout immediately — there’s no theme file to create or edit.
If a label you set doesn’t seem to be showing up, check which language you edited it on. Labels are set per language — if your store supports more than one, switch to the other language(s) from the dropdown next to the page title and set the label there too. See How to Customize Widget Language and Labels for how to support multiple languages.
If you need more than these labels
Need something this editor doesn’t cover — contact field labels, thank-you page text, tips, discount notices, shipping error messages? Contact Birdchime Support or email us — we can make those changes for you.
Related Articles
Was this article helpful?
Thanks for your feedback!