
 Getting Started
How to Enable Bird Pickup and Delivery Date Widget in Your Shopify Theme
Enable the Bird App widget in your Shopify theme to allow customers to select delivery or pickup dates during checkout.
What This Does
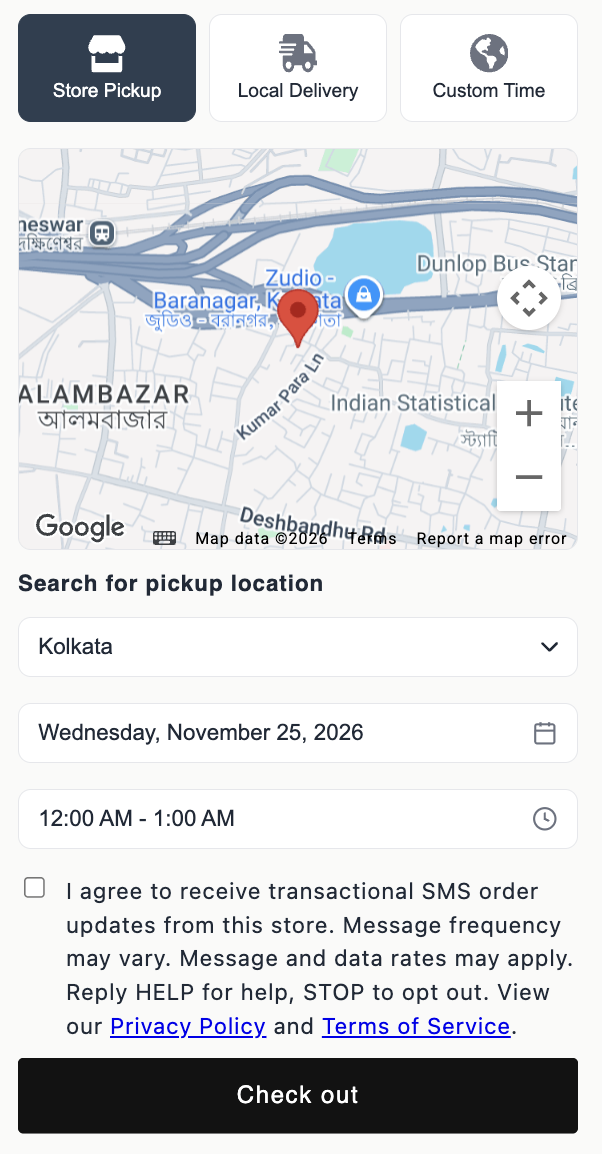
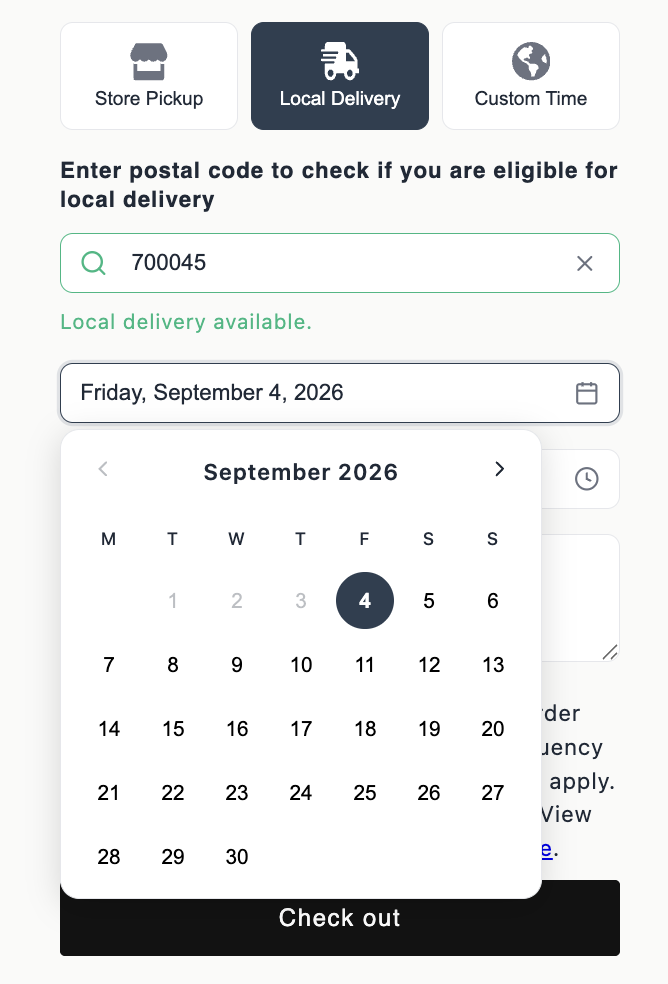
The Bird App widget can appear on your cart page, product page, order status page, and thank you page, enabling customers to:
- Choose between store pickup, local delivery, and shipping
- Select dates and time slots (when configured)
- Validate postal codes or distance-based delivery areas for your customers
- View real-time calendar availability
Note: The widget is not only a date picker. Some merchants use the widget even without date selection functionality, focusing on delivery method selection, postal code validation, and distance-based delivery areas.
All new installs run the current widget by default — a faster rebuild with the product page widget, a pickup store finder, and a cleaner UI. If a store still shows the older look on the cart page, see How to Switch from the Legacy Widget to the Current Widget.
When to Enable the Widget
Enable the widget when:
- You’ve completed or are completing Bird Pickup & Delivery: Full App Setup Guide or have skipped widget installation
- You want to install the widget on a development theme or other additional themes
- You need to reinstall after changing your live theme or publishing a new theme
How to Enable the Widget
App Embed Block Recommended
The dashboard shows two options: App Embed Block and App Block.
- App Embed Block → Recommended. Stable and battle-tested.
- App Block → Discouraged. Enabling both causes conflicts.
If App Embed Block is already enabled (green), no further action needed.
For custom positioning, use the Placement CSS selector in Settings > Developer (Developer Settings).
Step 1: Access Widget Placement
- Navigate to the Bird App dashboard in your Shopify admin
- Click Bird Settings → Widget placement
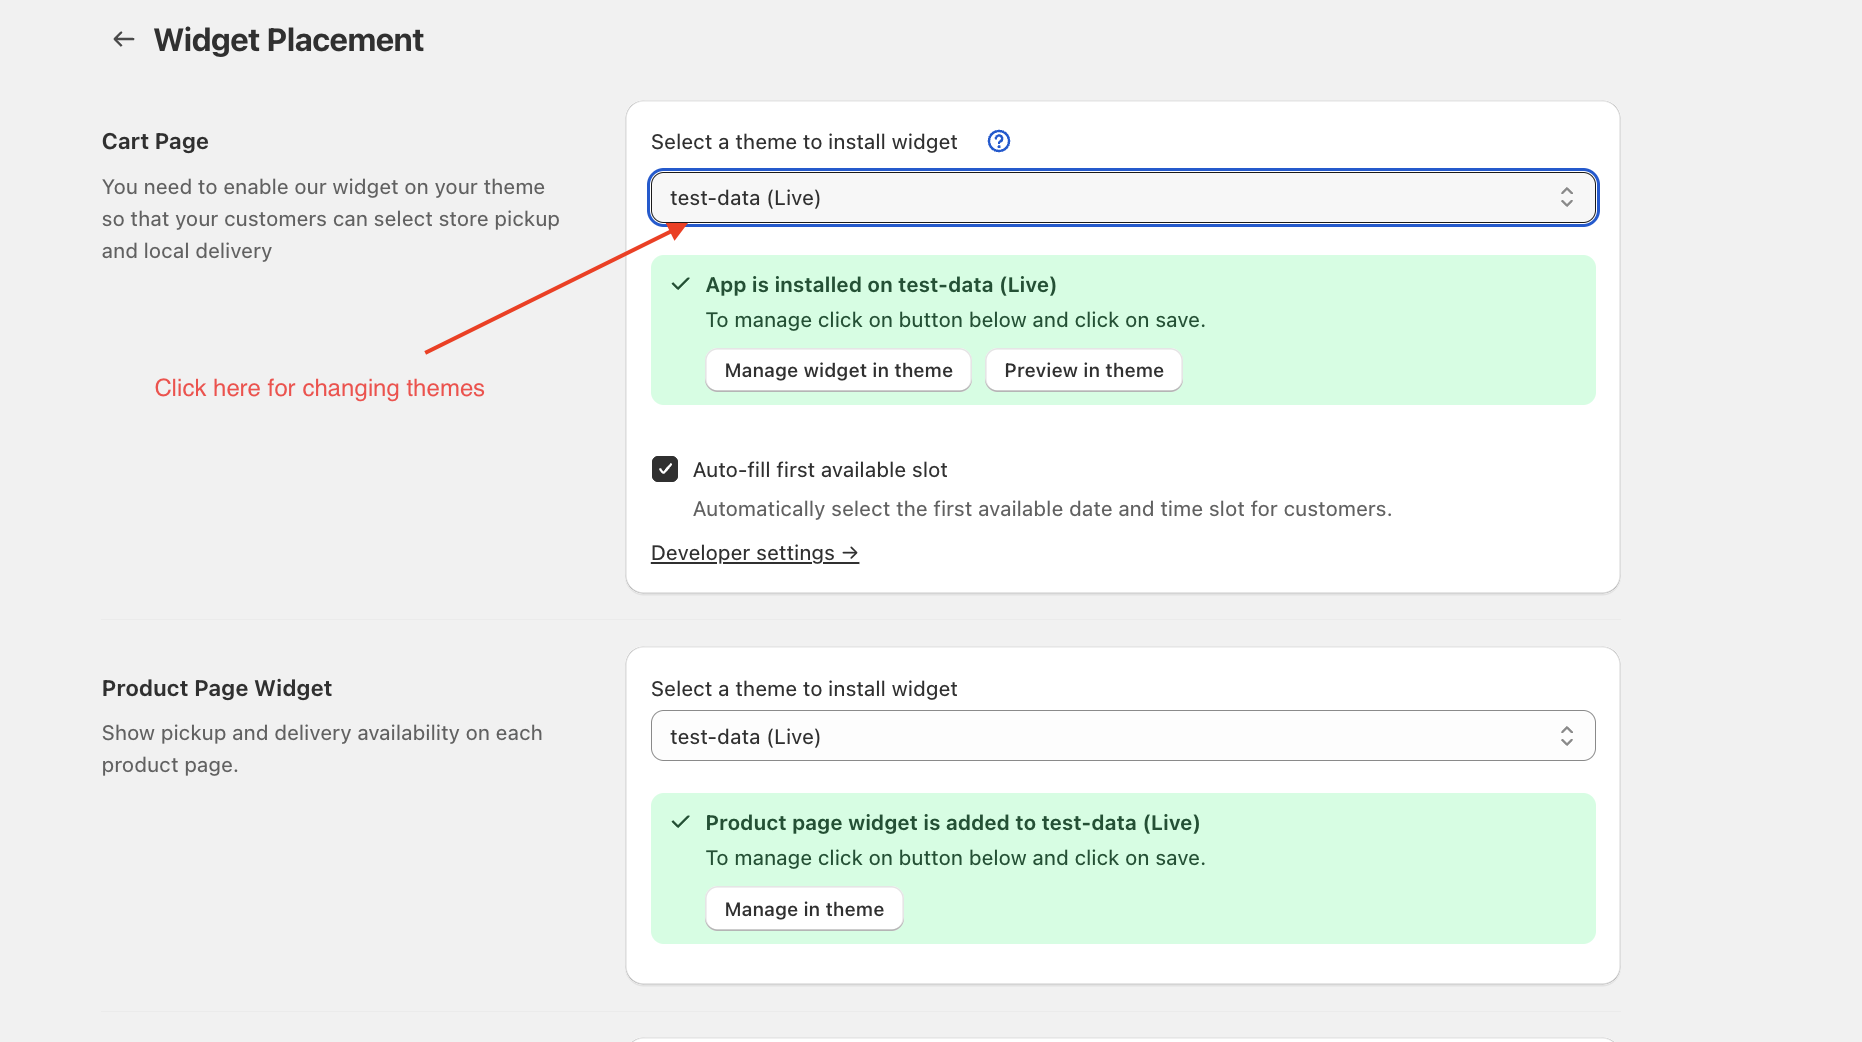
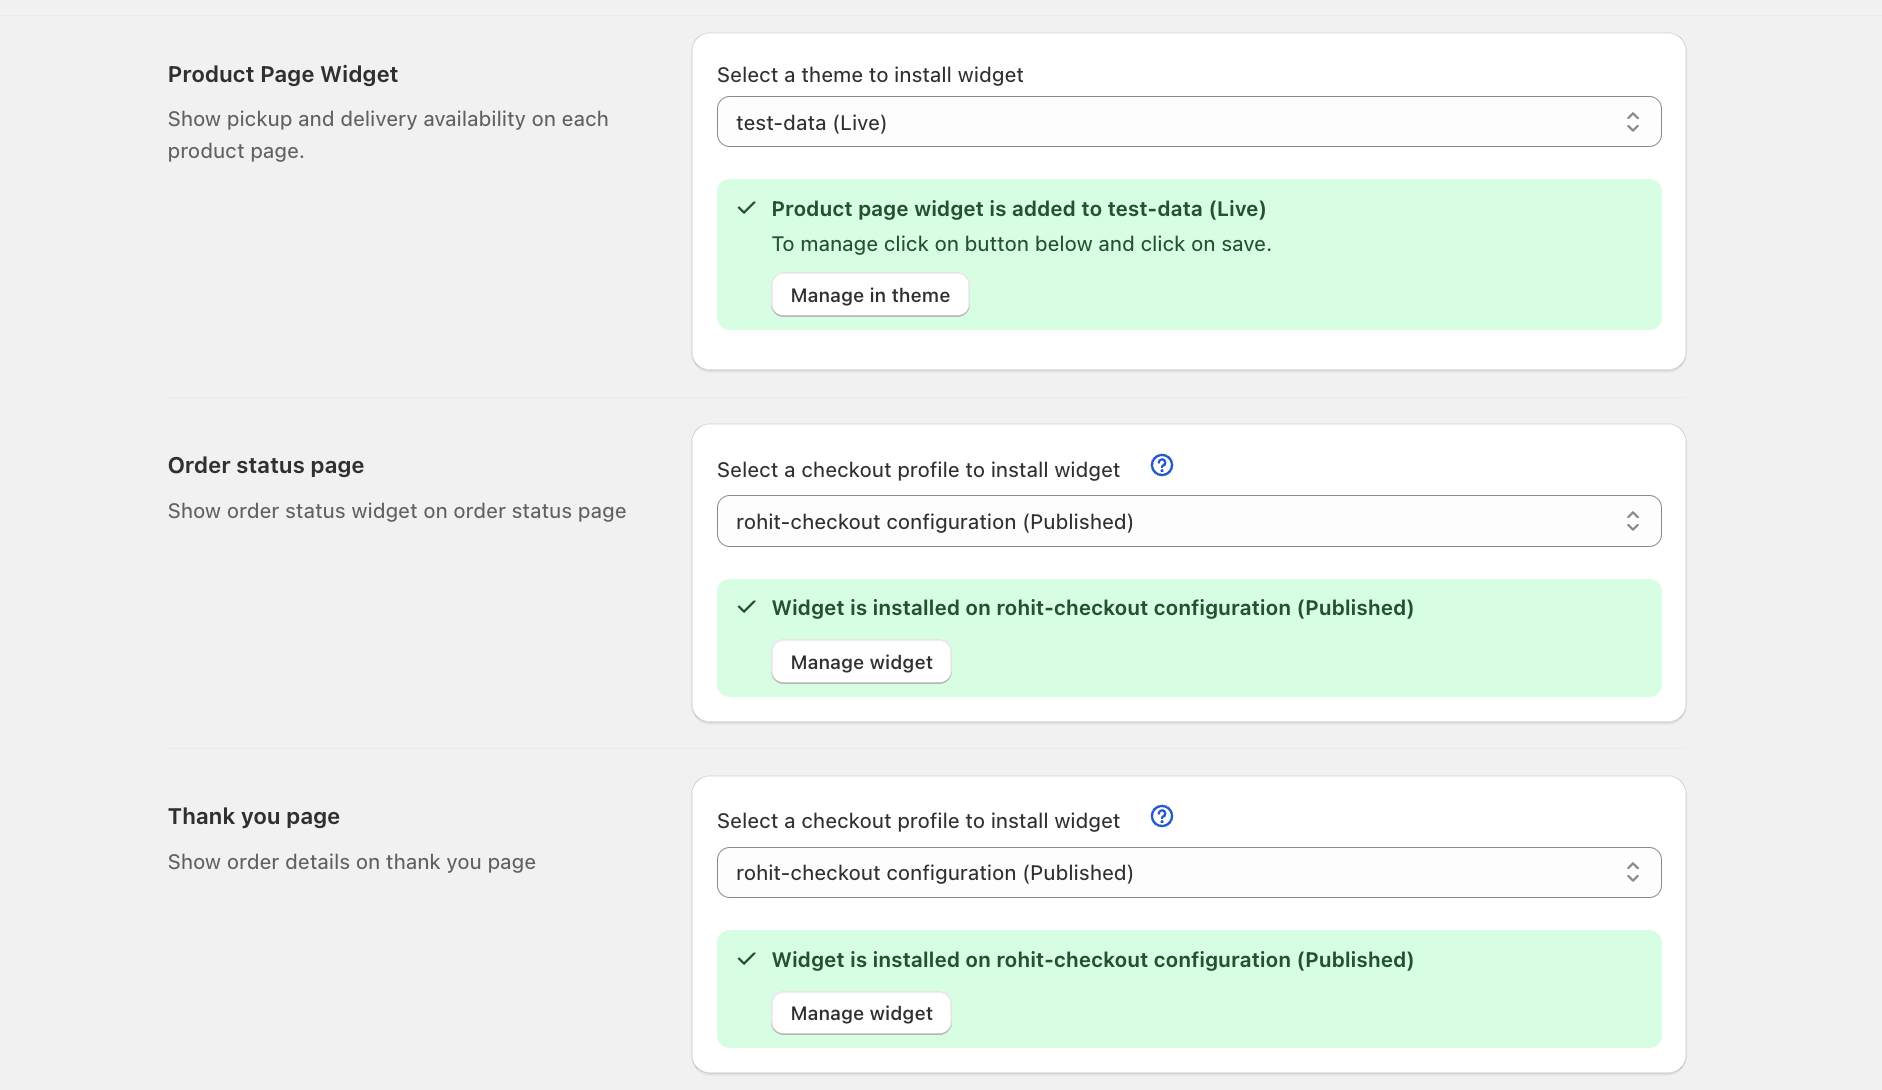
The Widget placement page has a section for each place the widget can appear, each with its own install control: Cart page, Product page widget, Order status page, and Thank you page. Shopify Plus stores also see a Checkout page section at the top. This guide covers the Cart page, the most common starting point.
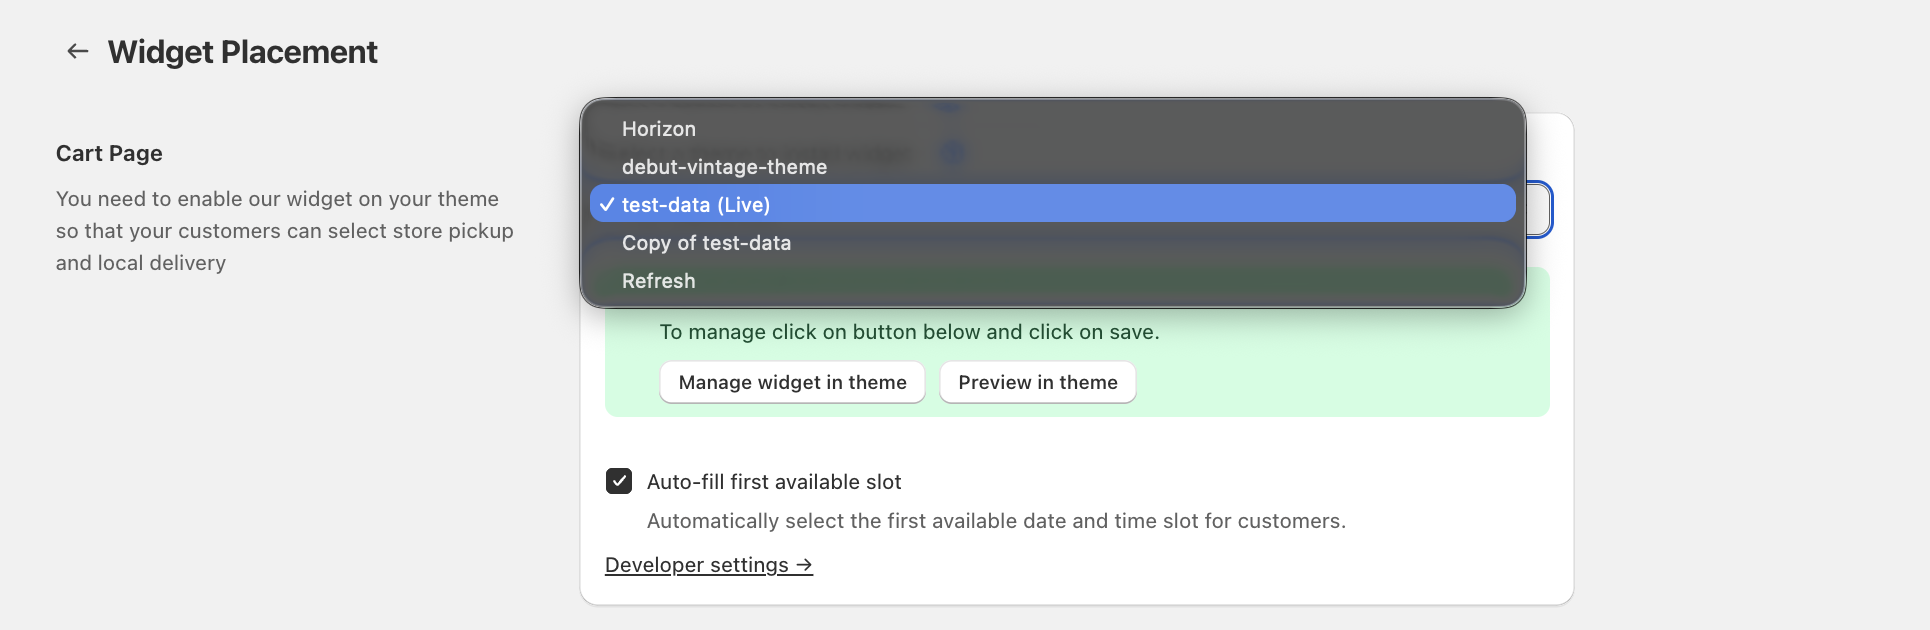
Step 2: Select Your Theme and Install
Under Cart Page: select a theme from Select a theme to install widget, then click Add widget in theme. Once installed, the box turns green and shows Manage widget in theme and Preview in theme buttons instead.
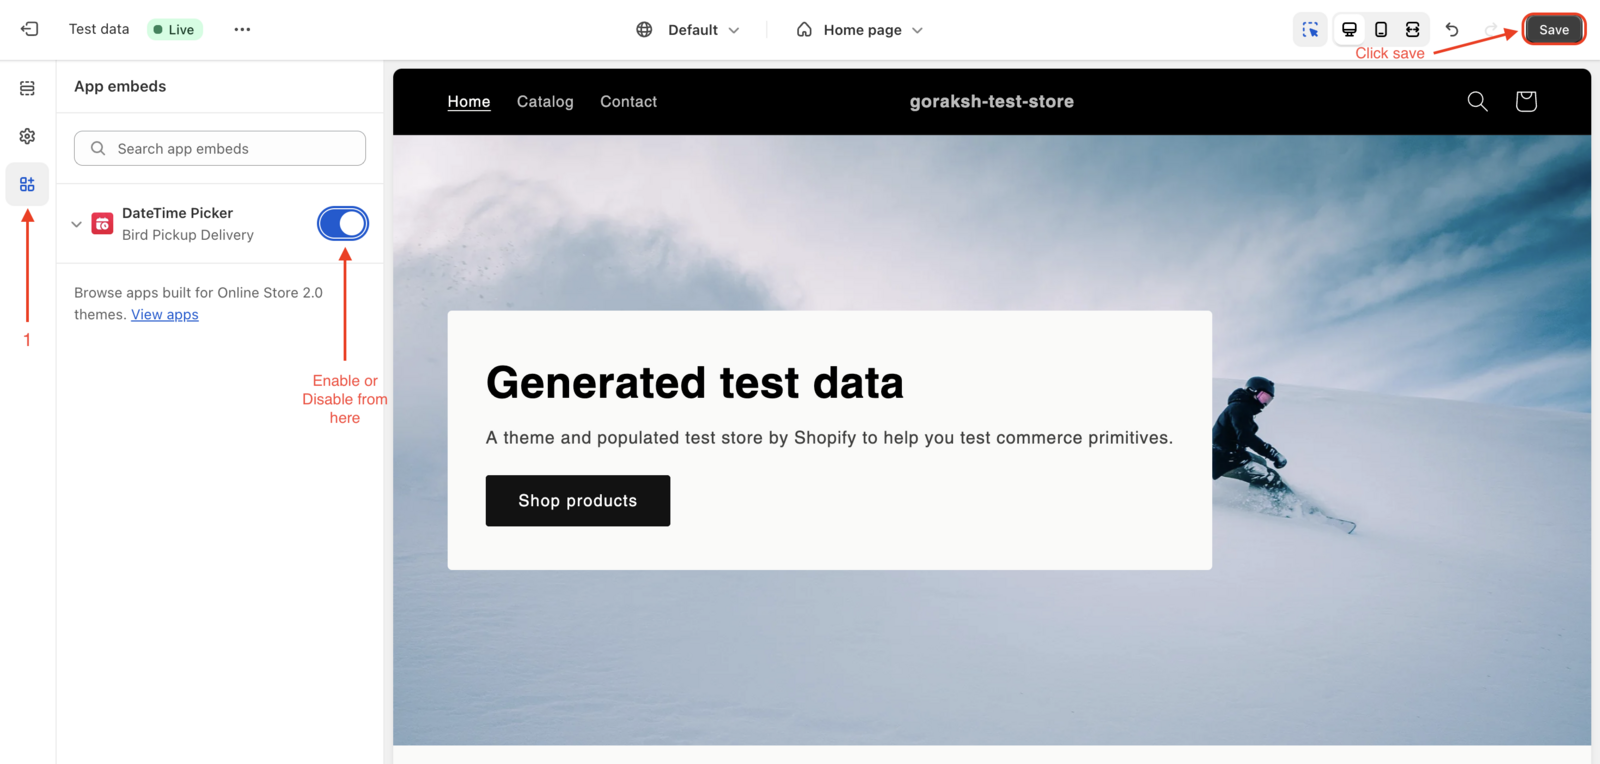
Step 3: Enable App Embed
- Select App embed section
- Toggle the widget to enabled
- Click Save settings
Step 4: Verify Installation
- Add a product to the cart on your store
- Navigate to the cart page
- Confirm the Bird widget appears
Also Available: Product Page, Order Status, and Thank You Page
Each of these installs separately from Cart Page, using the same Select a theme to install widget or Select a checkout profile to install widget control in its own section on the Widget Placement page:
- Product Page Widget — shows pickup and delivery availability on each product page, before add-to-cart. See How to Set Up the Product Page Widget in Shopify.
- Order status page — shows the order status widget on the order status page. Installs against a checkout profile, not a theme.
- Thank you page — shows order details on the thank you page. Also installs against a checkout profile.
Customize Widget Text and Labels
Change calendar labels and widget text to match your brand voice.
- Navigate to Bird App Settings → Text and Languages. The page opens directly on your default language.
- If you have more than one language, pick the one you want from the language dropdown next to the page title.
- Find the relevant field (e.g., Calendar Label) field
- Update the text to your preferred wording (e.g., “Request a date” or “Request pick up date”)
- Click Save to apply changes
Note: Text customization exist in Text & Languages setting. Widget Placement controls where the widget appears, not what text it displays.
For complete text customization options, see How to Customize Widget Language and Labels.
Verification Checklist
✅ Widget appears on cart page ✅ Date picker shows available time slots ✅ Delivery, pickup, and shipping options are visible ✅ Widget matches your theme design
Common Issues
Widget Not Visible:
- Widget is not visible due to unsupported or custom theme changes (Refer to Widget Placement: Manual (CSS) - Advanced customization options)
- Ensure settings are saved after enabling
- Clear browser cache and refresh
- Verify theme selection is correct
No Date Options:
- Check your schedule setup: Set Up Different Schedules for Multiple Store Locations
- Verify products are included in delivery settings
- Review Store Pickup: Configure Availability — Delivery Days and Time Windows
CSS Selector Positioning Not Working:
- App Block may be enabled alongside App Embed Block
- Disable App Block in the theme’s App Embeds to restore manual positioning functionality
Enable widget V2 Checkbox Greyed Out:
- Multi-location is not enabled. At the top of Bird Settings, choose I have different schedule for different store locations, then return to Widget placement
Related Articles
Was this article helpful?
Thanks for your feedback!