
 Getting Started
How to Add Blockout Dates to Multiple Locations at Once
Save time during holidays or closures by applying blockout dates to multiple locations in a single action — instead of editing each location one by one.
This feature is available for Store Pickup and Local Delivery locations. Shipping does not use location-based blockout dates.
Table of Contents
When to Use This
Use bulk blockout dates when you want to close the same dates across multiple locations at once:
- Holidays — Block Christmas (Dec 25) across all your stores in one step
- Company-wide closures — Staff training days, annual shutdowns, severe weather
- Extended breaks — Summer or winter closures that apply to all locations
For location-specific closures (e.g., only one store is closed), configure blockout dates individually in each location’s settings instead.
Prerequisites
- Multi-location is enabled in Bird Settings
- Locations must have Store Pickup or Local Delivery enabled
Step-by-Step
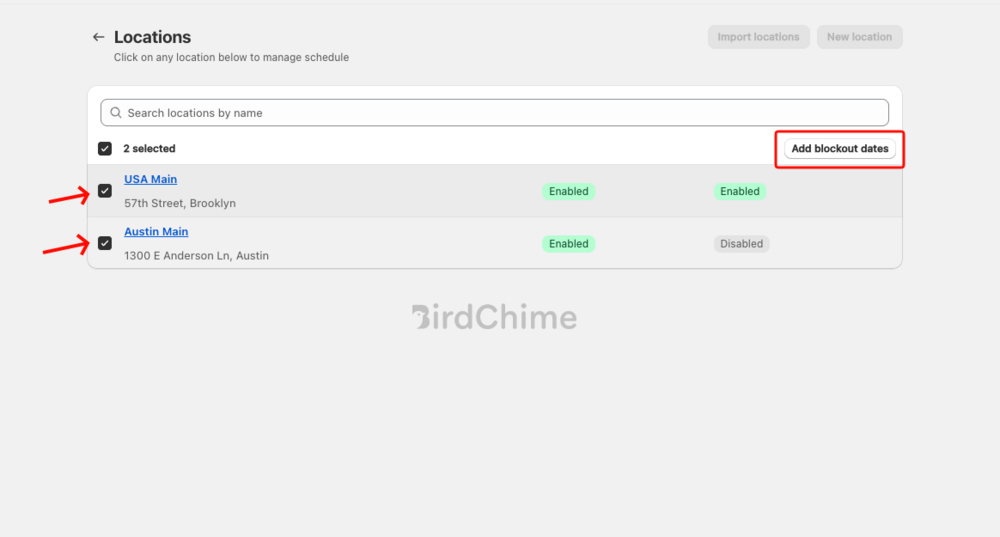
Step 1: Select Locations
- Go to Bird Settings > Configure Locations
- Check the box next to each location you want to update
- Once at least one location is selected, an Add blockout dates button appears in the top-right corner
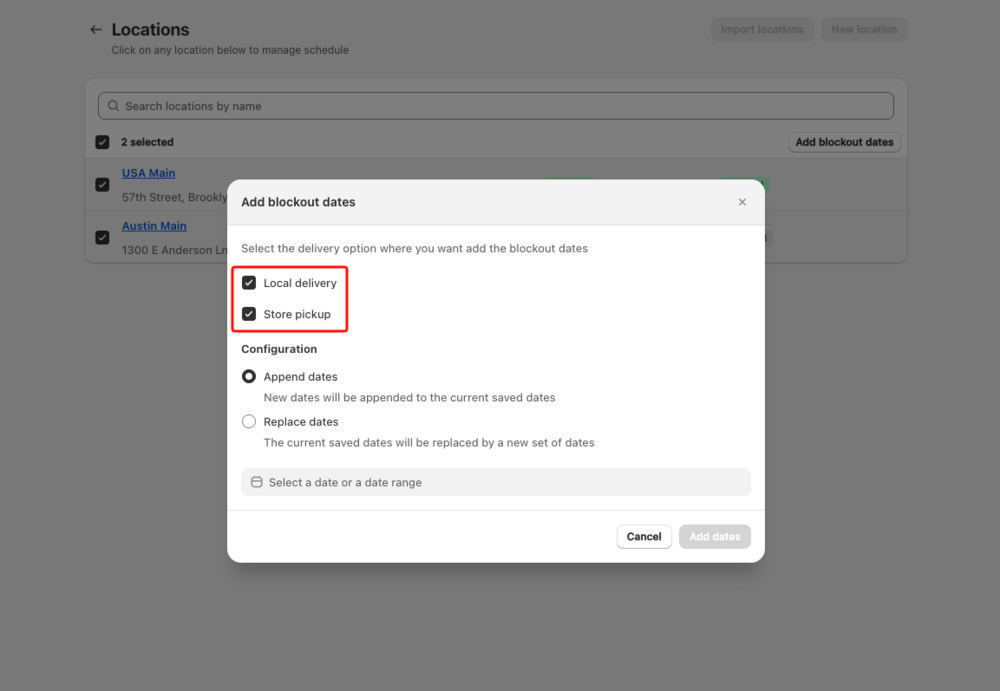
Step 2: Choose Delivery Options
Click Add blockout dates. A modal opens. At the top, choose which delivery methods to apply the dates to:
- Local delivery — applies to Local Delivery settings for the selected locations
- Store pickup — applies to Store Pickup settings for the selected locations
- You can check one or both
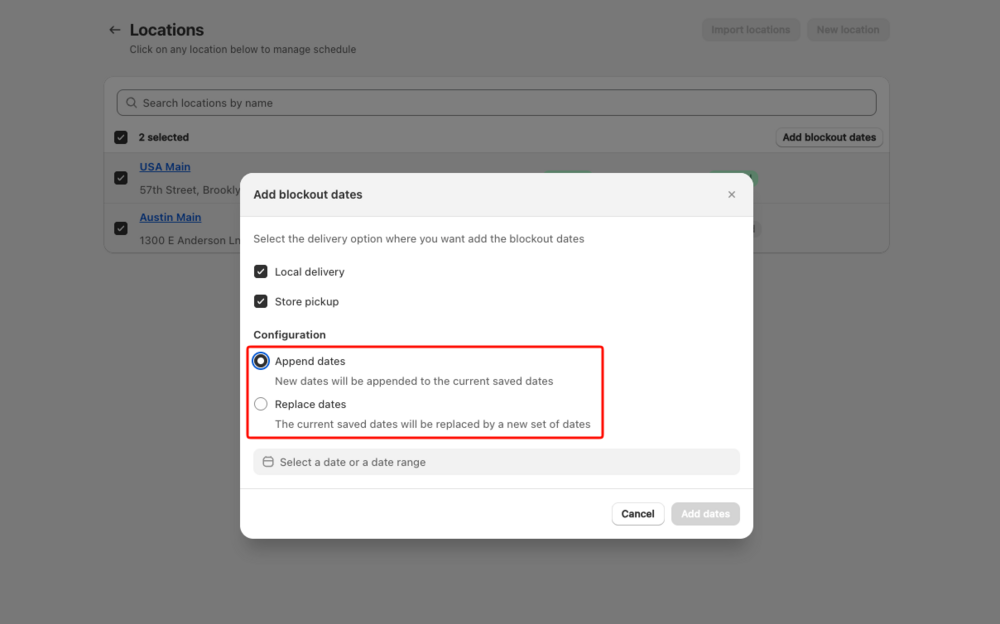
Step 3: Choose Append or Replace
Under Configuration, choose how the new dates interact with existing blockout dates on the selected locations:
- Append dates (default) — adds the new dates on top of any already saved. Existing dates are kept.
- Replace dates — removes all existing blockout dates and replaces them with the new selection.
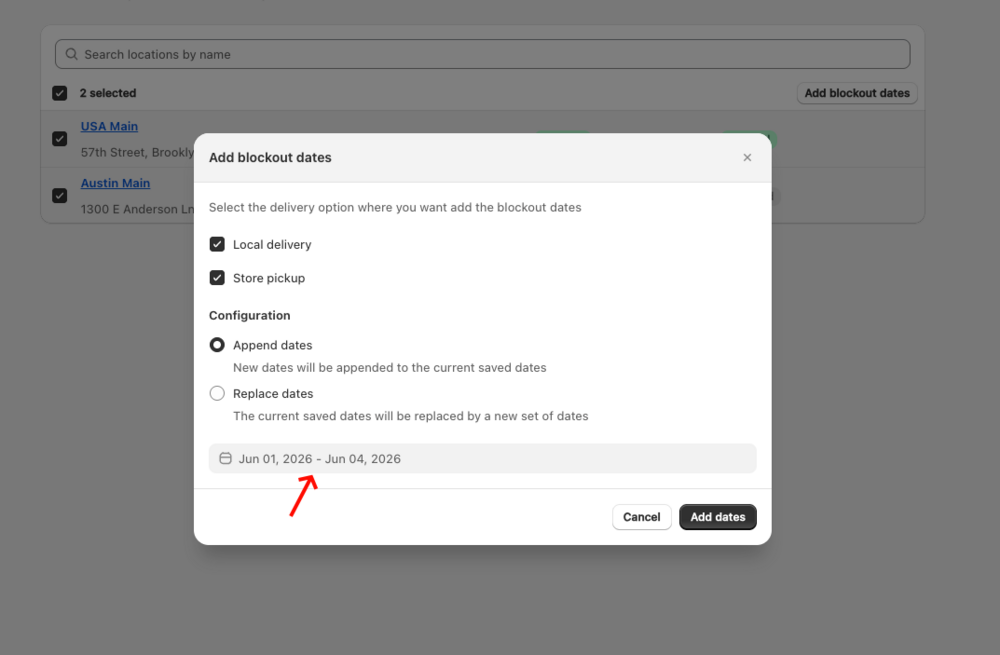
Step 4: Select a Date or Date Range
- Click the date input field at the bottom of the modal
- A date picker opens — navigate months using the left/right arrows
- Click a start date, then click an end date to select a range (or click a single date for a single day)
- Click Done to confirm your selection

The selected range appears in the date field of the modal.
Step 5: Apply
Click Add dates. Bird applies the blockout dates to all selected locations for the chosen delivery methods. A success notification confirms the update.
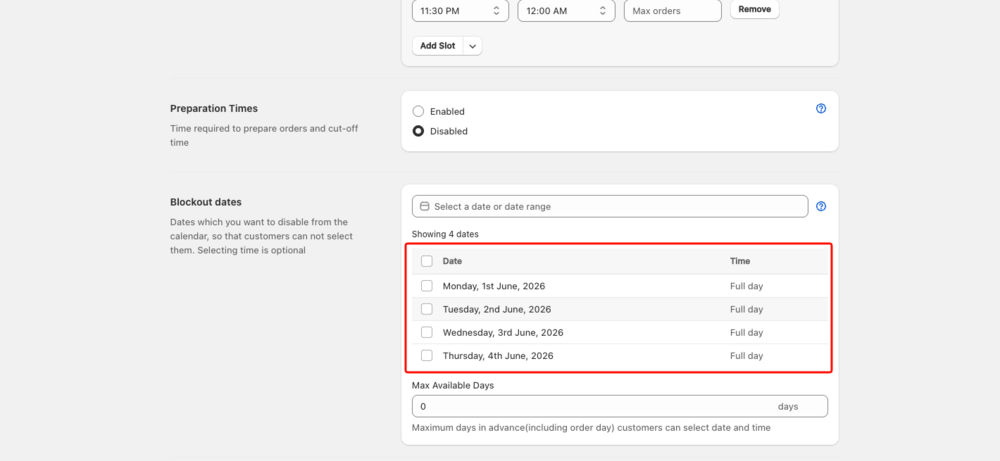
To verify, open any of the updated locations, go to Edit Settings for Store Pickup or Local Delivery, and check the Blockout dates section — the new dates will appear in the table.
Append vs Replace Explained
| Append | Replace | |
|---|---|---|
| What it does | Adds new dates alongside existing ones | Overwrites all existing blockout dates |
| Best for | Adding holiday dates without disturbing existing closures | Resetting blockout dates across all selected locations |
| Risk | None — existing dates are preserved | Existing blockout dates are permanently removed |
Example — Append:
- Location A already has Dec 25 blocked
- You bulk-append Dec 26 across all locations
- Result: Location A now has Dec 25 + Dec 26 blocked
Example — Replace:
- Location A has Dec 25, Dec 26, Dec 27 blocked
- You bulk-replace with Jan 1
- Result: Location A now has only Jan 1 blocked — Dec 25–27 are removed
Related Articles
Was this article helpful?
Thanks for your feedback!