
 Order Management
Customer View: Display Date & Time on Thank You & Order Status Pages
You’ll learn how to show customers their pickup or delivery date, time, and method on the Thank You page and Order Status page, right after they check out.
Customers who can see their selection confirmed after checkout are less likely to contact you asking “when is my order coming?”. Bird does this with an app block called Bird Order Details, which you add to each page in Shopify’s checkout editor.
What Customers See
The Bird Order Details block shows the details the customer picked in the Bird widget:
| Detail | Thank You page | Order Status page |
|---|---|---|
| Method (Pickup, Local Delivery, or Shipping) | ✅ | ✅ |
| Date | ✅ | ✅ |
| Time slot | ✅ | ✅ |
| Order note (if the customer left one) | ✅ | ✅ |
| Pickup location name and address, with a Google Maps link | Pickup orders only | Pickup orders only |
| Pickup security code, with QR code | ❌ | Pickup orders only, if enabled |
| Edit link to change the date or time | If enabled | If enabled |
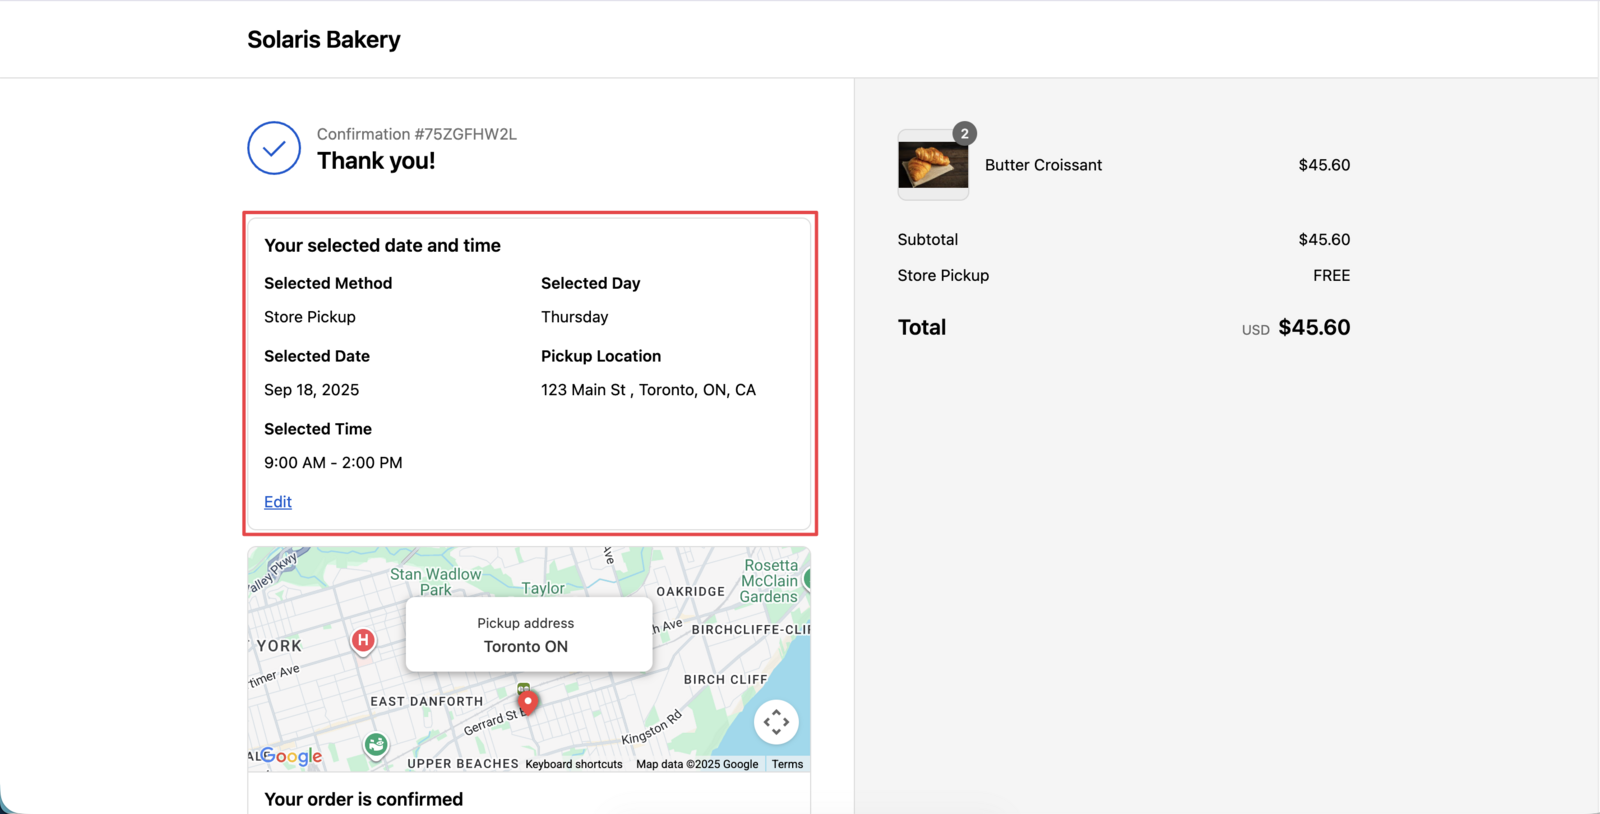
The Thank You page and the Order Status page each need their own block. Adding it to one page doesn’t add it to the other.
Step 1: Open the Checkout Editor from Bird
- Open the Bird app from your Shopify admin and go to Home
- Find the Widget & extension status card and expand it
- Under Checkout & post-purchase, click Customize next to Thank you widget (or Order status widget)
Shopify’s checkout editor opens directly on the page you chose.
Step 2: Add the Bird Order Details Block
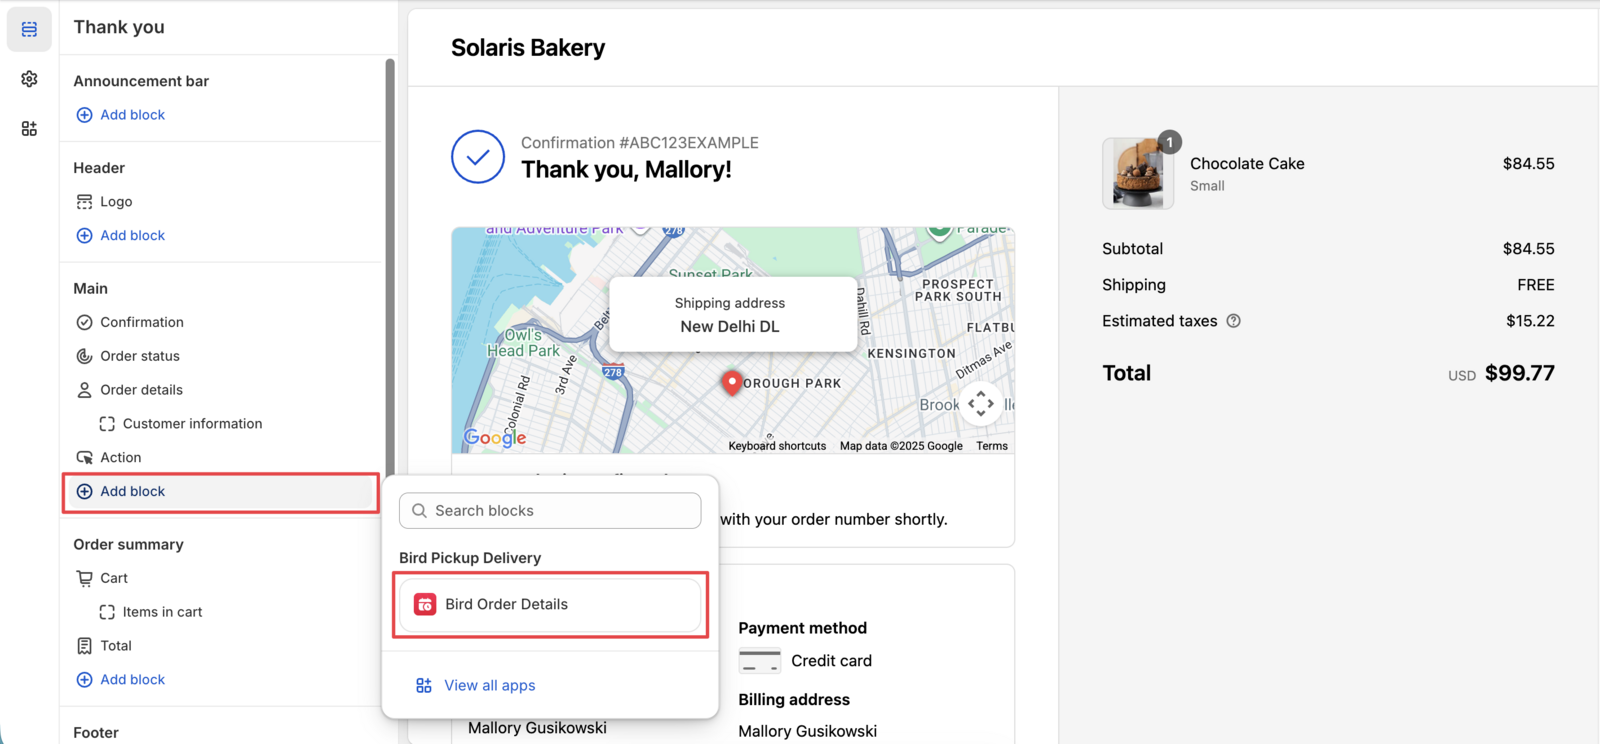
- In the checkout editor, click Add app block
- Select Bird Order Details
- Drag the block to where you want it on the page
Step 3: Save and Repeat for the Other Page
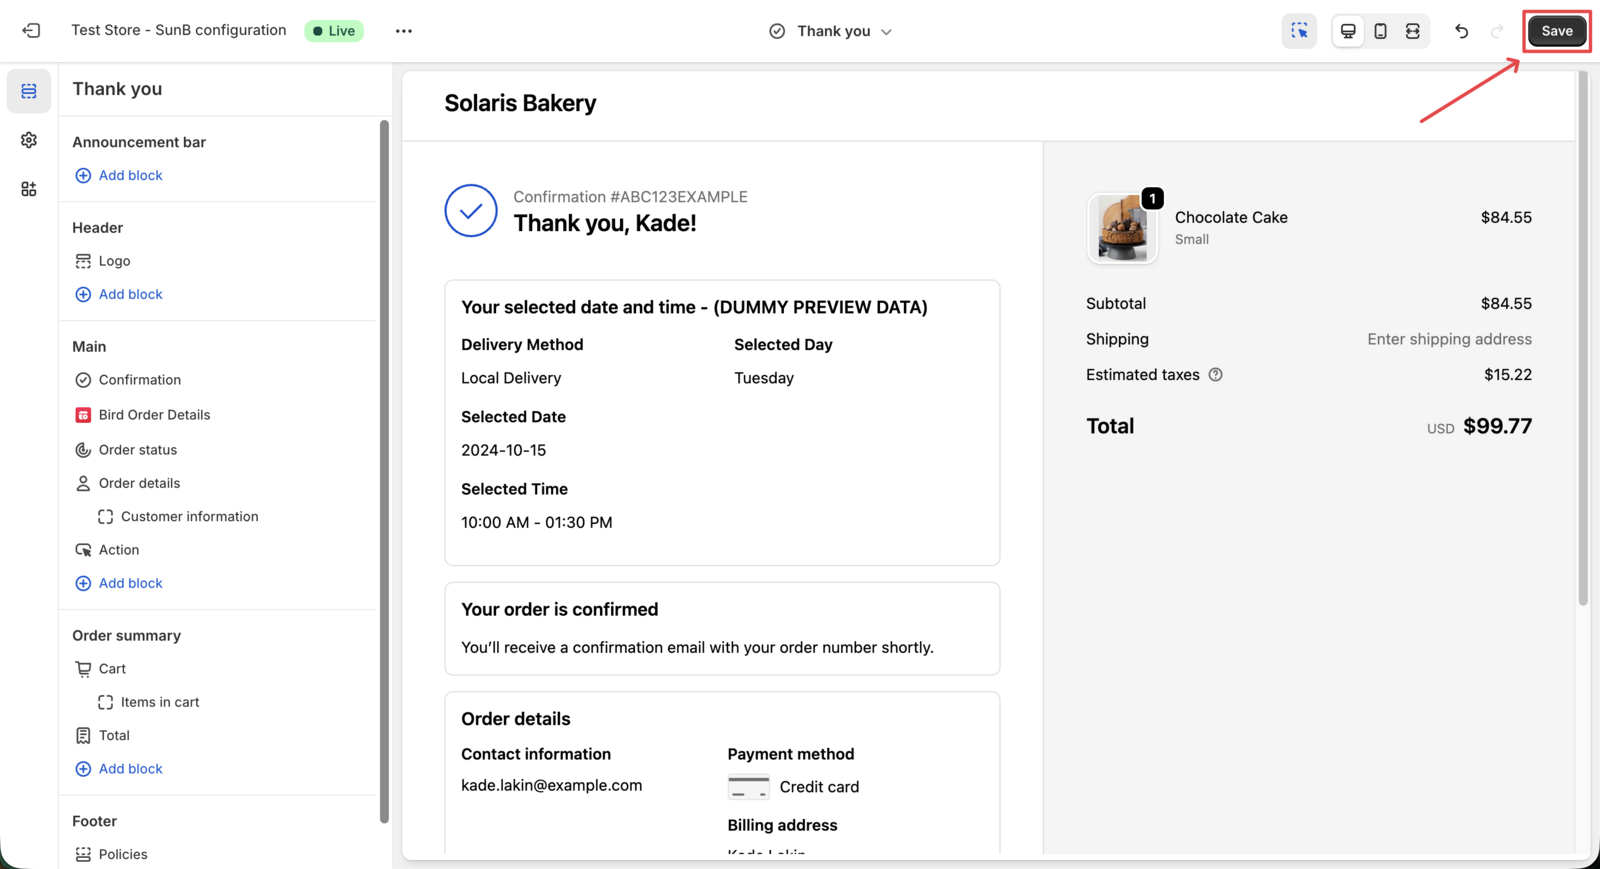
- Click Save in the top right corner
- Go back to the Widget & extension status card and repeat Steps 1 and 2 for the other page
Refresh the Bird dashboard and that row’s badge changes from Disabled to Active.
Step 4: Place a Test Order
Pick a date and time in the Bird widget, complete checkout, and check that the block appears on the Thank You page. Open the order’s Order Status page to check that block too. See Verify Your Widget Setup: Place a Test Order.
Let Customers Edit Their Date or Time
The block can also let customers reschedule their own order, so they don’t have to contact you to move a pickup or delivery.
Date/time editing requires the Scale plan.
Turn On Editing
- Go to Bird Settings > Order management
- In the Date/time editing section, check Allow users to edit date and time, then save
An Edit link now appears on the Bird Order Details block, on both the Thank You page and the Order Status page.
What Customers Can Change
When a customer clicks Edit, a calendar opens with the dates that are still available for their order. They pick a new date, pick a time slot if that day has more than one, and click Submit.
- Only the date and time can change. Customers can’t switch between pickup and delivery, or move the order to a different location.
- Your scheduling rules still apply. The calendar follows the same lead time, blockout dates, and slot availability as the Bird widget at checkout.
When Customers Can’t Edit
The Edit option stops working:
- On the scheduled pickup or delivery day itself
- Once the scheduled date is inside your lead time. For example, with a 2-day lead time, an order scheduled for tomorrow can no longer be moved.
In these cases the customer sees an error message instead of available dates. You can change that message in Bird Settings > Text and languages, under Order status page (the Thank you page slots not available error field).
What Happens After a Customer Edits
- The new date and time replace the old ones on the order, in both Bird and Shopify.
- The order’s Bird tags update to match the new date.
- A Customer Updated Date/Time At entry is added to the order’s Additional details in Shopify, showing when the customer made the change.
- For pickup and local delivery orders, your staff get the New order notification email again with the new details, if that location has staff email recipients set up. See Staff: Set Up Notifications via Bird App.
Customize the Block
- Change the heading and labels. The heading (“Your selected date and time”) and each row label are editable in Bird Settings > Text and languages, under Order status page. See How to Customize Widget Language and Labels.
- Hide the pickup location. If you’d rather not show the pickup address on these pages, contact us through the in-app chat and we’ll turn it off for your store.
Troubleshooting
| Problem | Why it happens | Fix |
|---|---|---|
| The block doesn’t appear on a test order | The block only shows on orders where the customer picked a method in the Bird widget. Orders placed without a Bird selection show nothing. | Place a test order that goes through the Bird widget. If it’s still missing, see Why are date and time not appearing on my orders? |
| It shows on the Thank You page but not the Order Status page (or the reverse) | Each page has its own block. | Repeat Steps 1 to 3 for the missing page. |
| No Edit link on the block | Date/time editing is turned off, or your store isn’t on the Scale plan. Editing turns off automatically if you move to a lower plan. | Turn it on in Bird Settings > Order management. See Let Customers Edit Their Date or Time. |
| Customize shows Unavailable | Bird was opened outside the Shopify admin. | Open Bird from Apps in your Shopify admin and try again. |
| Customize is greyed out | The Bird app is turned off. | Turn the app on in Bird Settings first. |
| No location shown on a pickup order | The pickup location has been hidden for your store. | Contact us if you want it shown again. |
Related Articles
Was this article helpful?
Thanks for your feedback!