
 Rates
Rates
Delivery Zones: Distance
This article helps you charge different local delivery rates based on how far the customer is from your store, measured in a straight line (radius) or by road (driving distance).
The customer enters their address, and Bird assigns them to the nearest zone that covers it. Distance zones work in countries without standard postal codes (such as the UAE, Qatar or Hong Kong), and when postal codes don’t match your delivery areas. To compare them with postal code zones, see Choosing a Zone Type.
Radius or Driving Distance
You choose one mode for your whole store in Step 2.
- Radius: measures the straight-line distance from the zone’s address to the customer.
- Driving distance: measures the distance by road, using Google’s Routes API. Choose this when a short straight line can mean a much longer drive, for example across a river or in a dense city.
Both modes need a Google Maps API key. Both also need I have different schedule for different store locations turned on in Bird Settings, since each zone is its own location. See Set Up Different Schedules for Multiple Store Locations.
Step 1: Get a Google Maps API Key
- Go to Google Cloud Console.
- Create a new project or select an existing one.
- Enable the Places API and the Geocoding API. For driving distance, also enable the Routes API.
- Create an API key in the Credentials section.
- Set up billing for your Google Cloud project (Google requires it to use these APIs).
For more detail, see Google’s documentation on API keys.
Step 2: Choose Radius or Driving Distance
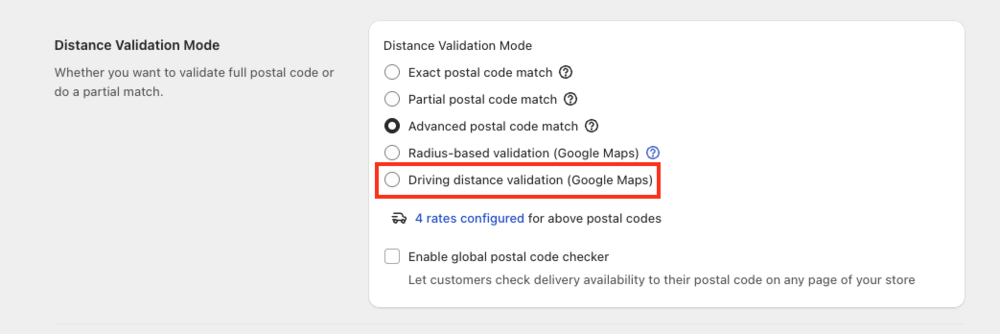
- Go to Bird Settings > Delivery > Distance validation mode.
- Select Radius-based validation (Google Maps) or Driving distance validation (Google Maps).
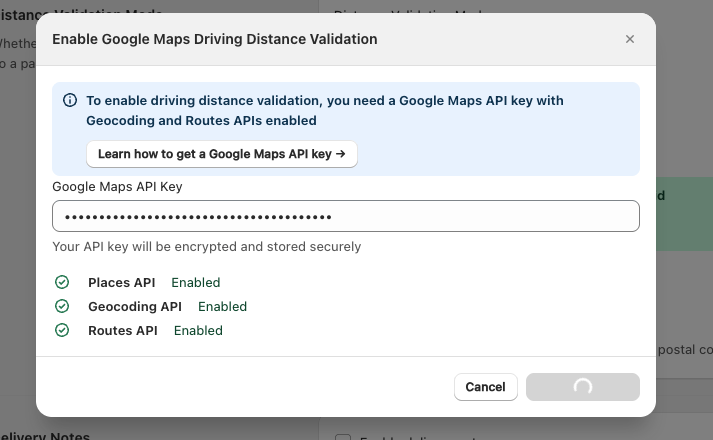
- In the dialog that opens, enter your key in Google Maps API key.
- Click Validate & save.
Bird tests your key and shows Enabled next to each API it needs: Places API and Geocoding API, plus Routes API for driving distance. It saves the mode only when all of them show Enabled. If one shows Not enabled or invalid key, enable that API for your key in Google Cloud Console and try again.
Step 3: Create a Zone for Each Area
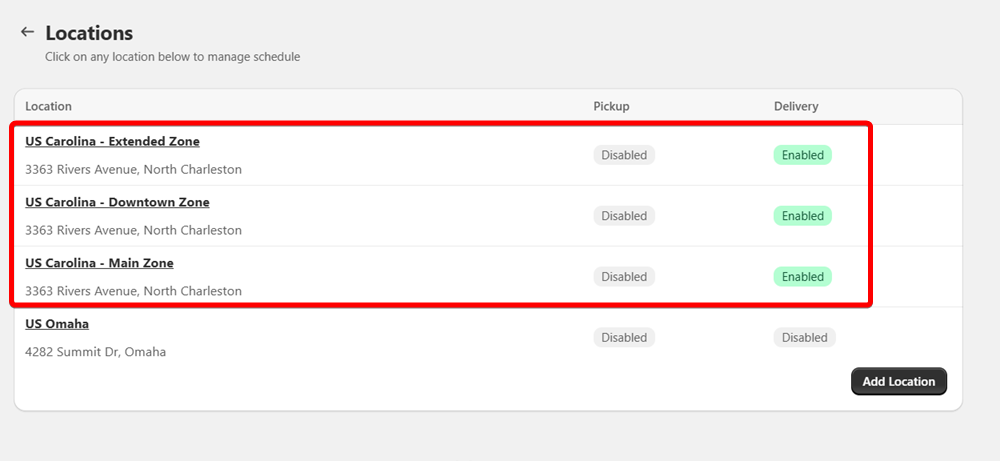
- Go to Bird Settings > Configure locations.
- Create or duplicate a location for each zone.
- Rename each one after its zone (for example, “Main Store”, “Downtown Zone” or “Extended Zone”).
Bird measures distance from each zone’s address. To create rings around one store, duplicate the store location and keep its address on every copy.
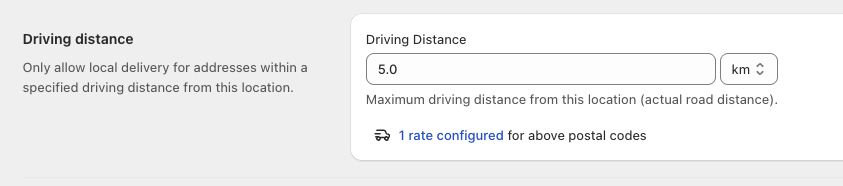
Step 4: Set Each Zone’s Distance Limit
- Select a zone and check Enable local delivery.
- Click Edit settings for local delivery.
- Go to Local delivery radius (radius mode) or Driving distance (driving mode).
- Enter the maximum distance and choose km or mi.
| Location | Distance limit |
|---|---|
| Main Store Location | 5km |
| Downtown Zone | 10km |
| Extended Zone | 15km |

Step 5: Add Rates for Each Zone
- In the Bird app, go to Rates.
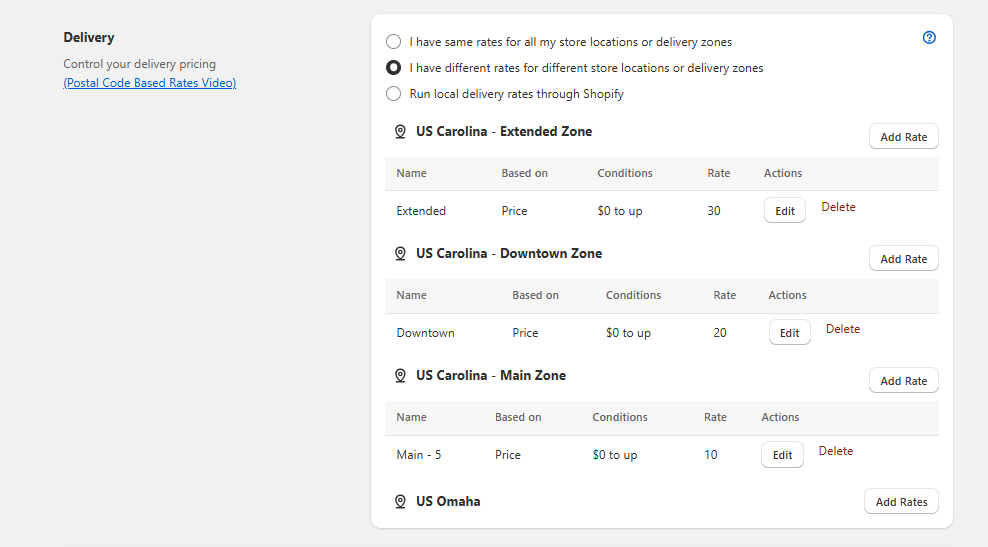
- In the Delivery section, select I have different rates for different store locations or delivery zones.
- Add rates for each zone. See Delivery Rates for rate conditions.
| Location | Delivery rate |
|---|---|
| Main Store Location | $10 |
| Downtown Zone | $20 |
| Extended Zone | $30 |
Each zone’s rates apply to every address it’s assigned.
Step 6: Update the Widget Labels
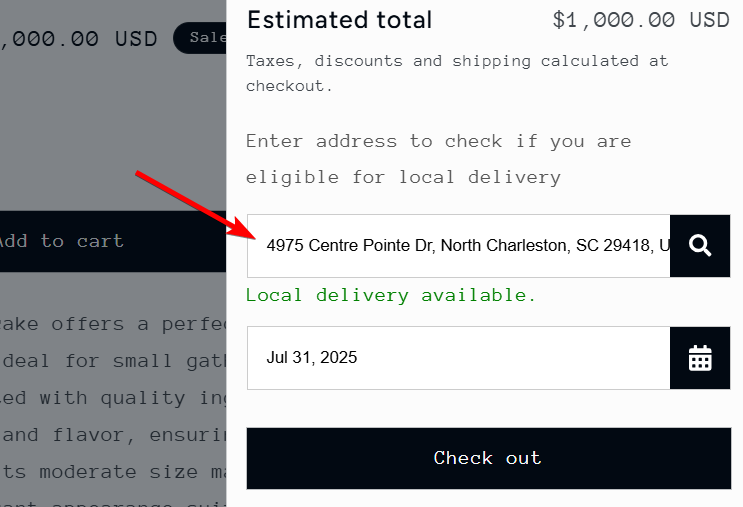
The widget’s default text asks for a postal code. Change it to ask for an address.
- Go to Bird Settings > Text and languages. The page opens on your default language. If you have more than one language, pick one from the language dropdown next to the page title.
- Open the Cart page section and update:
- Zip/postal codes header: for example, “Enter your address to check if you are eligible for local delivery”
- Zip/postal codes label: for example, “Enter your address”
- Zip/postal codes success and Zip/postal codes error (optional): mention the address instead of the postal code
- Save your changes.
Step 7: Test Your Setup
- Enter addresses at different distances from your zones.
- Check that Google Maps suggests addresses as you type.
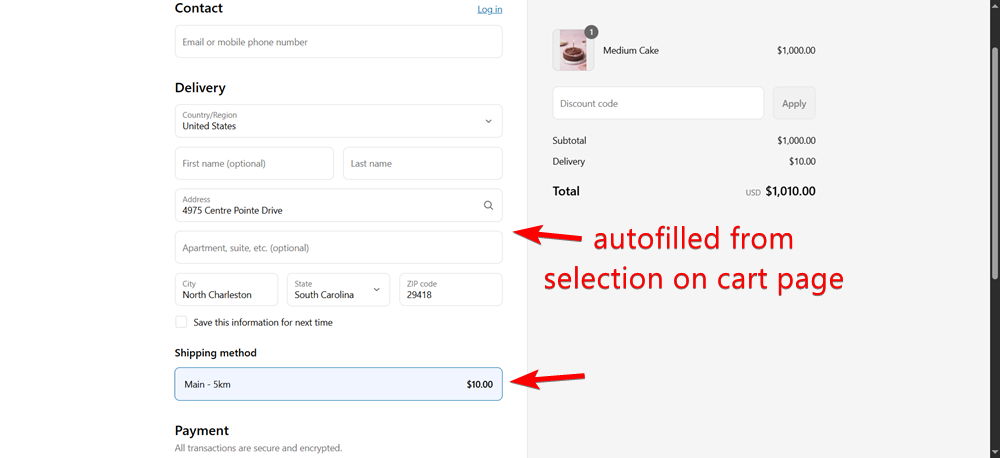
- Check that each address gets the right zone and rate.
- Try an address outside every zone’s limit.
- Check that your new labels and messages show.
How Bird Picks a Zone
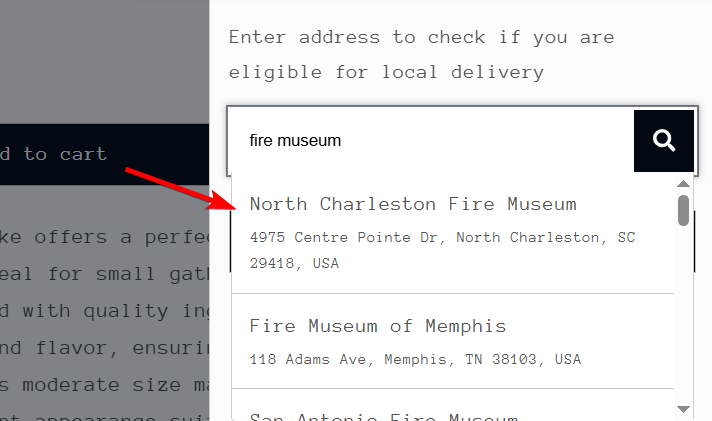
- The customer types their address in the delivery widget, and Google Maps suggests matches.
- The customer selects their address.
- Bird measures the distance from each zone to the address (straight line or by road, depending on your mode).
- Bird picks the nearest zone whose limit covers the address. If two zones are the same distance away (for example, copies that share your store’s address), it picks the one with the smaller limit.
- The customer sees that zone’s rates and picks a date and time from its schedule.
If no zone covers the address, the customer is told it’s outside your delivery area.
Related Articles
Was this article helpful?
Thanks for your feedback!